Our usual priority list after landing in a new country looks like this (the order can change, obviously):
- Get off the plane / bus / train
- Get the luggage
- Go through immigration / customs if necessary
- Get some local currency (usually at a local ATM)
- Get a SIM card
- Get to where we’re staying
Table of Contents
It’s the ‘Get a SIM card’ step that I’ll focus on today.

Wait, what’s a SIM card?
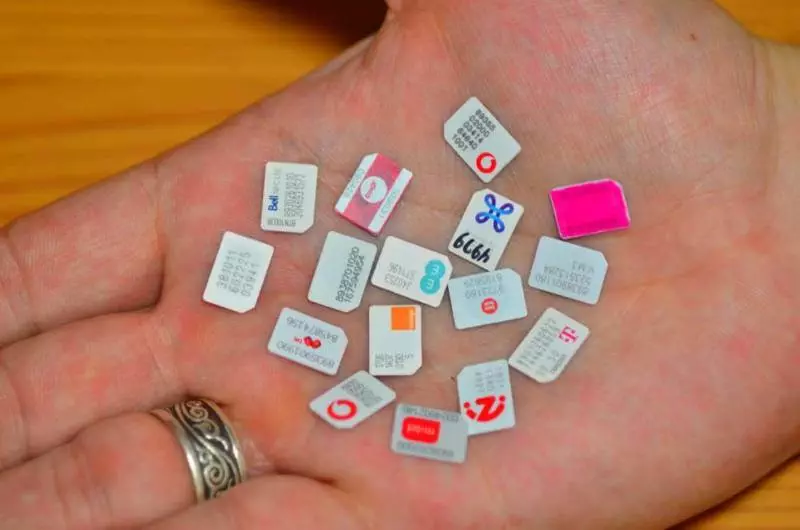
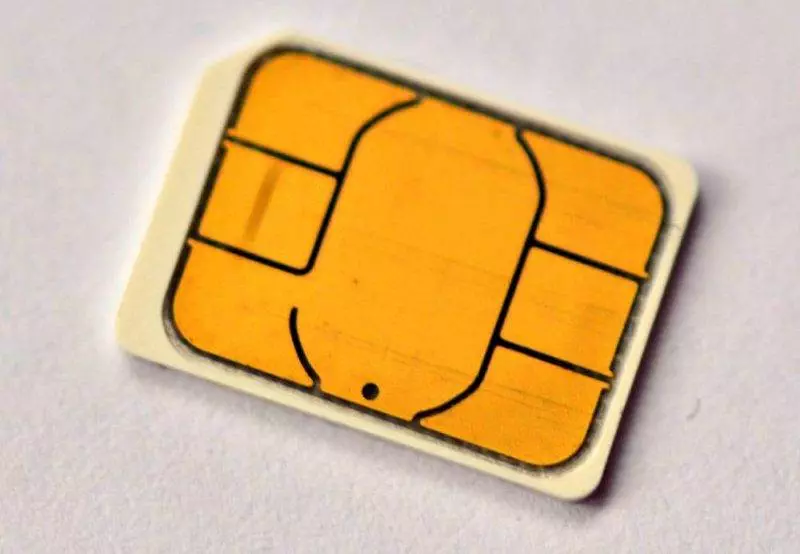
Essentially, a tiny plastic/metal memory card for your phone. SIM cards come in three sizes: standard (15 x 25mm), micro (12 x 15mm), and nano (8.8 x 12.3mm). Your phone only uses one of these sizes, and the more recent the phone, the smaller the SIM card usually is.
Why do I need a SIM card?
It’s what allows your phone to connect to the local network, and thus the internet. Using the SIM card from a previous country means you’ll be roaming internationally and paying a lot more, most likely. (Yes, yes, I know all about the ‘roam like at home’ thing Europeans are supposed to have’. I’ll get to that. This is an absolute beginner’s guide, so if you know about that you’re like 3 steps ahead of the game.)
Can my smartphone use it?
I’ll assume your smartphone is unlocked (able to use any SIM card in the world or isn’t tied to a specific carrier). If you bought it from a network provider and are making monthly payments on it, it may be locked to that service provider. The easiest way to check if your phone is unlocked is to borrow a friend’s phone on a different network. If it works, you’re probably good to go. If it doesn’t work or you get some sort of error message, it might be locked. There are ways to unlock smartphones, both through your provider and other means but that’s not the point of this piece.
Will my smartphone work in [insert country here]?
Almost certainly. Most modern smartphones will handle almost any sort of frequencies used around the world. I’m thankful for this personally — we’re well past the talk of ‘tri-band’ or ‘quad-band’ phones that used to be an issue…
So buying a local SIM card once I arrive is the best option?
Yes. There are a few other options for special cases (they’re towards the bottom of this post). If you’re spending more than a week in a given country, a local SIM card will probably be the cheaper and better option.
Step 1: Research.
Boring! I hear you – just another thing to figure out before you arrive, right?
Researching this one’s easy, though. My website of choice is http://prepaid-data-sim-card.wikia.com. Scroll down to find the country of choice, then read the page for that country. It’s a wiki, meaning you can edit it to show off what you’ve learned… but that’s a different story. For right now, just learn the names of the biggest providers, and whether any of them are recommended (or not recommended—. Assume the exact plans and packages talked about on the site will change or may be slightly out of date. Try to learn whether packages automatically renew or stop after the package runs out.
Step 2: Know what you need

Most travelers will need a fair amount of data, but few need a ton of minutes or messages. How much data you’ll need obviously depends on how much of your life is lived from your mobile device.
If you’re on an iPhone (as of iOS 12 / May 2019), go to Settings > Cellular > Current Period to see how much data you’ve used since the last reset period (scroll all the way down to see when that was — usually it’s the last time the SIM card was changed). You can also reset it here to track how much data you use in a week or month.
If you’re on Android, go to Settings > Data usage. You may need to select some dates, or you may be presented with data usage across a specific date range.
If you’re still in doubt, aim for 2-3 GB for a month. For the average, active user of a smartphone, that should be more than enough.
Step 3: Purchase.
Once at the airport / bus terminal / train shop, find the shop for the provider(s) of choice. You might find a ‘Tourist SIM package’, but honestly these are usually overpriced and include a bunch of extras you probably won’t use.
You wait a prepaid SIM card, meaning you’re paying for the SIM card and adding some money to your account. This is usually the easiest part of the process, though some providers like to make it more challenging to compare your options. In most cases, it’s easiest to simply ask the salesperson what packages they offer.
Packages usually include a set number of minutes, messages, and amount of data for a given amount of time (usually 30 days). Some providers consider data packages as an upgrade or add-on to a voice plan. In cases like this, I’ll ask about a ‘data-only’ SIM card since I don’t need to make many calls or send many SMS messages.
Wait, what’s a ‘data-only’ SIM card? Physically speaking, it’s just another SIM card. Where available, data only SIM cards come with a data allowance, but no minutes or messages. I don’t really call people unless necessary, and I’ll use Skype, Facebook, or another VOIP app that uses data instead of the usual Messages app.
Why do I need a package? Virtually every provider in the world is happy to change a ‘default rate’ per minute, message, or megabyte. These default rates are far higher than those found in a package, and can be used as an incentive to get you on a package of some kind.
Once you’ve selected a package, have your phone and passport handy, then let them get to work. Most countries will ask for a passport or another ID to open an account, and the salesperson will need to set everything up on their computer. This is a good time to take a moment, catch your breath, remind yourself of whatever else you need to do, and so on. If your phone’s in a case, take it off. You’ll usually be asked to sign some legalese paperwork as well.
In most cases, the salesperson will hand you a small packet with the SIM card inside. The observant amongst you will note that SIM cards today are manufactured as part of a credit-card-sized piece of plastic, with parts that carefully break apart to become any of the three SIM card sizes. Keep everything for now — this usually has some helpful info about the service, and a label or hand-written note may have your phone number on it.
Step 3B: because some countries do it differently
OK, so step 3 was the ‘official shop’ approach. This step 3B is generally found in developing countries and may (or may not) be needed.
Essentially, step 3B has you buying a SIM card from a kiosk, tobacco shop, corner store, or whatever the local type of place may be. It’s the sort of sidewalk-based building where you’ll find bags of chips, drinks, and a tiny little window to pay the person through. Not every kiosk sells every type of SIM card, and I’ve yet to see a kiosk that provided any help with them. You can also top-up / refill / add credit at most (but not all) kiosks. More on this in a minute.
Step 4: install
SIM cards have only one place to go and can only be inserted in a specific direction.
On an iPhone: ask for (or carry inside your phone case) a paper clip. iPhone have a tiny hole in the side, which physically opens the SIM card tray on the right-hand side of your phone. I’ve also seen an earring and staple used — it just needs to be tiny and strong. Carefully pull the tray out, remove the old SIM card, then put the new one in.
On an Android: most SIM cards are located behind the battery. Remove the case and battery, slide the old SIM card out, then slide the new SIM card in.
Some SIM cards come ‘locked’, and can only be unlocked with a four-digit PIN that comes on the plastic card the SIM card was a part of. Do not throw this away! Scratch off the silver part (like a lottery ticket or gift card) to find the PIN, then type it in. SIM cards that are locked usually need the PIN every time the phone is restarted, so keep the card in your wallet / purse.
Step 5: Confirm it works
Most providers will automatically send some text messages (usually in the local language) to tell you things are registered or other details. For the most part, you can ignore these.
Don’t leave yet! Most SIM cards from most providers begin to work immediately or within a few minutes. You should see the company’s name in the upper left corner and the type of connection you have (3G, 4G, LTE, etc.). Turn off your wi-fi (if it was on) and go to any website in your browser of choice. If it loads, you’re all good.
If it doesn’t load, check to make sure your Cellular Data is turned on (it’s sometimes turned off by a salesperson), then ask the salesperson to take a second look. You’re not usually able to see their computer screens, but there’s a lot of data entry and things to check. It’s easy for them to overlook something.
Basically, don’t walk away from the shop until you’re sure it works. It’s easier to deal with any problems then and there instead of trying to find a shop to fix a problem someone else made.
Step 6: refill / top-up / add credit
If you got a package good for a month and you’re only in the country for a month or less, you won’t need to worry about refilling. Enjoy. For the rest of us, refilling, topping up, or adding credit are three terms that all mean the same thing: adding money to our account.
In some cases, this is most easily done on the provider’s website — look at the packaging for a website, and from there an English option. (Side note: sometimes the English version of the site lacks the features of the local language version. In cases like this, it’s better to load the local language and use Google Translate.)
In other cases, it may be easier to head to one of the stores and top-up there. They’ll need to know your phone number and how much money you want to put on. They should also be able to renew a service for you if you want.
As a last resort (often available but not recommended), you can dive into the world of keypress codes. These are short combinations of letters and numbers that are sent via text message to a phone number. These have long been used to check account balance, how much data you have remaining in a package, and so on.
They can also be used to add / renew packages, and they’re specific to a country and provider. In general, you’ll text a specific code to a specific number to activate a specific package, and you’ll get a confirmation message or two when it’s done. In some countries, you’ll dial a code that uses # and * as you would a phone number. This code can activate a package or call up a menu of options like Aladdin’s genie.
I call it the last resort because these systems suck. They’re almost always in the local language, they can be difficult to navigate, and they may not have the package you want. Yes, they’re great options for locals that would rather do things fast, but that isn’t you. You can muddle through if necessary, but try to use one of the other options first.
Step 6B: refill / top-up / add credit at a kiosk
Boss level time! Assuming you’ve already purchased a SIM card, some kiosks can take your money and give you a voucher or receipt. It’ll have the amount and a keypress code to enter as a phone number. Enter it, then wait for the confirmation message.
But wait, there’s a twist! If your package has already run out, you might be on those default rates I talked about earlier. The minute that balance becomes active, your phone might immediately begin attempting to download data… which means it starts using data at that default rate… which means you suddenly don’t have enough money in your account to use the package you wanted.
The workaround here is to add the package immediately after adding the balance. If you’re unable to, turn off the data on your phone to avoid accidentally using data at the default rate.
Other random questions you’ve probably had about SIM cards
What’s a MVNO? Ahh, I see someone actually read the Prepaid Data SIM Card page! Well done, you!
A mobile virtual network operator runs a networking service, but doesn’t own the networking technology it runs on. If you’re from the US, Cricket is an MVNO — they pay another company to use their network, then add their own branding on a service. If you’re from the UK, Virgin and Tesco are two of many MVNO’s. I personally avoid them — yes, they’re often cheaper, but there are fewer shops, sometimes poorer coverage, and less support if something stops working.
What about a SIM card that works in more than one country? Yeah, there are some companies that offer a SIM card that ‘just works’ whereever you go. My biggest issue is the cost — you’re usually paying several times more per megabyte for the sake of convenience. Behind the scenes, they act as kind of an MVNO — and you may not know which network you’ll get until you arrive. WorldSIM, One Sim Card, and Gigsky are three options among others.
If you’ll be traveling through multiple countries for less than a week in each country, these are worth considering. You’ll have to figure out how to physically get the SIM card, and it’ll have to be shipped to you somewhere…
What’s ‘roam like at home’ all about? It’s a European Union initiative. In theory, an EU SIM card gets access to the same services in another EU country so you ‘roam like at home’. No more roaming charges! Huzzah!
Reality, as usual, is messier. Minutes and messages are generally fine, but data while ‘roaming’ is a different story. Your package might include, say, 5 GB, but only a fraction of that may be available for you while roaming. Making matters worse, this European Union initiative only matters in countries that are part of the European Union. Most Eastern European countries aren’t part of it.
What about Google Fi? If you’re a resident of the US and only taking occasional trips internationally, Google Fi is an option. The flat-rate plan is simpler, and most phones are supported (though Apple phone support is still in beta). That said, there’s this in their terms of service:
The Services are offered only to residents of the United States. The Services must be primarily used in the United States and are not intended for extended international use. Further, the Services are designed for use predominantly within our network. If your usage outside our network is excessive, abnormally high, or cause us to incur too much cost, we may, at our option and sole discretion, suspend your Google Fi account, terminate your service, or limit your use of roaming.
The last thing you want is to find yourself cut off unpredictably.
Conclusion
At the end of the day, a local SIM card is the cheapest option for almost every digital nomad out there. There are other options that can work if convenience is more important than cost. This is one of those things you’ll do every time you go to a new country, and the process is pretty similar every time.
This post was first published on my website, Becoming a Digital Nomad, and has been updated from that original publication.
Pin it!


